
From Amateur to Pro: The Fundamentals of Video Editing for Beginners
From snapping casual smartphone videos to crafting captivating visual stories, the journey from amateur to professional video editor is an exciting and rewarding one. While it might seem daunting at first, breaking down the process into fundamental principles and consistent practice will pave the way for stunning results. This comprehensive guide will equip budding editors with the foundational knowledge and practical skills needed to transform raw footage into polished, engaging video content.
At its core, video editing is the art of assembling, manipulating, and refining visual and auditory elements to create a coherent and compelling narrative. It goes beyond simply stitching clips together; it’s about crafting an experience, guiding the viewer’s emotions, and delivering a clear message.
Contents
- 1 What is Video Editing?
- 2 Core Concepts of Video Editing
- 3 Choosing Your First Editing Software
- 4 Hardware Considerations for Smooth Editing
- 5 The Power of the Cut
- 6 Trimming Techniques for Narrative Flow
- 7 Effective Use of Transitions
- 8 Basic Visual Effects for Enhanced Storytelling
- 9 Cleaning Up Your Audio Tracks
- 10 Enhancing Your Video with Sound Design
- 11 Establishing a Consistent Folder Structure
- 12 Naming Conventions for Easy Identification
- 13 Experimenting with Different Techniques
- 14 Refining Your Workflow for Efficiency
What is Video Editing?
Video editing is the post-production process of selecting and arranging video clips, manipulating audio tracks, adjusting colours, adding visual effects, and incorporating motion graphics to produce a finished video. It’s the stage where raw material transforms into a polished product. This involves understanding pacing, narrative flow, and how different elements contribute to the overall impact.
Core Concepts of Video Editing
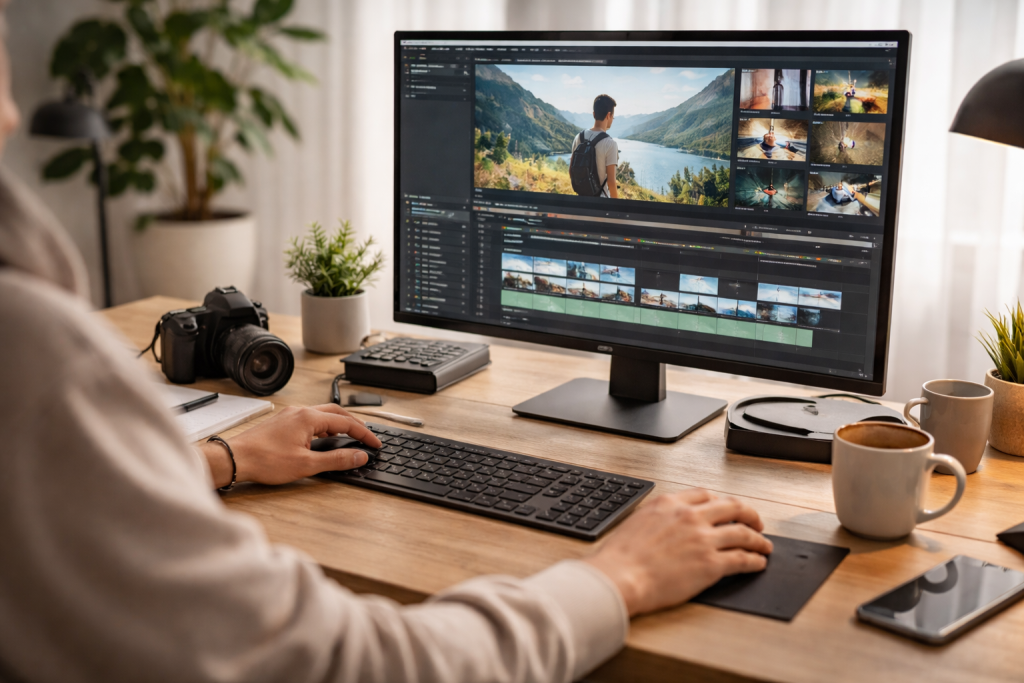
Several fundamental concepts underpin effective video editing. Understanding these principles will provide a solid framework for your editing journey. Frame rate, for instance, dictates the smoothness of motion, while resolution impacts the clarity and detail of your image. Aspect ratio determines the shape of your video screen, a crucial consideration for various platforms. Non-linear editing (NLE) software, the industry standard, allows editors to access and manipulate any part of their footage at any time without affecting other parts, offering immense flexibility. It’s also crucial to comprehend the timeline, which serves as the central workspace for arranging clips.
The right tools can significantly streamline your editing process and unlock creative possibilities. While the market offers a plethora of options, understanding the distinctions between them will help you choose wisely.
Choosing Your First Editing Software
For beginners, accessible and intuitive software is key. Free options such as DaVinci Resolve, a professional-grade tool with a robust free version, or HitFilm Express provide an excellent foundation for learning the basics without requiring a financial commitment. DaVinci Resolve, in particular, is an industry standard that offers powerful colour grading and audio capabilities, making it an excellent investment of your time to learn. More robust, paid options like Adobe Premiere Pro and Final Cut Pro are industry stalwarts, offering extensive features and deeper integration with other creative suites. Premiere Pro, being an Adobe product, seamlessly integrates with Photoshop and After Effects, creating a powerful ecosystem for creative professionals. Final Cut Pro, exclusive to Apple users, is known for its speed and user-friendly interface.
Hardware Considerations for Smooth Editing
Efficient video editing often demands a powerful machine. A robust processor, ample RAM, and a fast graphics card are crucial for rendering, effects, and smooth playback, especially when working with high-resolution footage. An SSD (Solid State Drive) for your operating system and project files will drastically improve loading times and overall performance compared to traditional hard drives. For storing large amounts of footage, an external HDD (Hard Disk Drive) or an SSD with substantial capacity is essential. A decent monitor with accurate colour representation is also highly recommended to ensure your final product looks as intended.
The foundation of any video edit lies in the precise art of cutting and trimming. This seemingly simple action is where your story truly begins to take shape.
The Power of the Cut
A well-placed cut can alter the pace, shift the focus, and evoke specific emotions. Learning to identify the “in” and “out” points of a clip is fundamental. This involves watching your footage critically and determining the most impactful moments to include. The ripple edit, for example, allows you to trim a clip while automatically adjusting the duration of all subsequent clips, maintaining synchronisation. Rolling edits, on the other hand, allow you to adjust the edit point between two clips without affecting the overall duration of the sequence.
Trimming Techniques for Narrative Flow
Beyond simple cuts, various trimming techniques contribute to a seamless narrative. J-cuts and L-cuts are powerful tools for creating smooth transitions between scenes and maintaining auditory continuity, as they allow the audio from one clip to start before or extend after its corresponding video. Understanding the rhythm and pacing of your footage is paramount. Sometimes, a quick succession of shots creates urgency, while longer takes can evoke a sense of calm or reflection. Practise observing how professional editors use cuts to build tension, introduce characters, or convey information efficiently.
After laying out your core story, transitions and effects can enhance your video, providing polish and visual interest. However, subtlety is often key.
Effective Use of Transitions
Transitions are more than just fancy wipes; they guide the viewer from one scene to the next. Dissolves can imply the passage of time or a gentle shift in mood, while a quick cut can create impact or abruptness. Overuse of elaborate transitions can be distracting and unprofessional. Stick to a few versatile options initially, like fades, cross dissolves, and simple cuts, and use them judiciously. The choice of transition should always serve the narrative purpose and not merely be for visual flair.
Basic Visual Effects for Enhanced Storytelling
Even basic visual effects can significantly enhance your video. Colour correction and grading, for example, can set the mood, improve consistency across different shots, and make your footage look more professional. Adjusting brightness, contrast, saturation, and hue can drastically impact the visual appeal. Cropping and scaling certain elements can draw attention to details. Simple text overlays can provide context or introduce speakers, while a subtle vignette can add a cinematic touch. Explore the built-in effects within your chosen software and learn how to apply them purposefully.
Often overlooked by beginners, audio is at least half of the video experience. Poor audio can instantly detract from even the most stunning visuals.
Cleaning Up Your Audio Tracks
Before anything else, cleaning up your audio is crucial. This involves removing unwanted background noise, hums, and other distractions. Most editing software offers tools for noise reduction and equalisation. Learning to identify and isolate specific frequencies can dramatically improve speech clarity and overall sound quality. Properly setting audio levels is also essential to avoid clipping (distortion) or sections that are too quiet to hear. Normalise your audio to achieve a consistent volume throughout your video.
Enhancing Your Video with Sound Design
Beyond merely cleaning audio, sound design is about creating an immersive auditory experience. Adding background music can set the tone and emotional landscape of your video. Choose music that complements your visuals and narrative. Sound effects, such as ambient sounds, foley sounds, or specific action sounds, can add realism, depth, and impact. For example, the sound of footsteps can ground a character in their environment, while a sharp “whoosh” can emphasise a quick movement. Layering different audio elements carefully creates a rich and engaging soundscape.
A well-organised project is a happy project. Efficient organisation saves time, reduces frustration, and ensures a smoother editing workflow, especially as your projects grow in complexity.
Establishing a Consistent Folder Structure
Before importing your first clip, please consider creating a logical folder structure. This typically includes folders for raw footage, audio, graphics, project files, exports, and specific subfolders within each. For example, your raw footage folder might contain subfolders organised by date or camera. This systematic approach ensures you can quickly locate any asset when needed, preventing hours of searching for a missing file. Being meticulous from the start will pay dividends in the long run.
Naming Conventions for Easy Identification
Consistent naming conventions for your files are equally important. Instead of “DSC001.MOV”, name your clips descriptively, such as “Interview_Johnathan_Shot1.MOV” or “B-roll_Park_EstablishingShot.MP4”. Similarly, name your project files with versions, like “MyProject_v1.0.prproj”, to easily revert to earlier iterations if necessary. This clarity is invaluable when collaborating with others or revisiting old projects.
Just as writers have a unique voice, editors develop a distinctive style. This comes from experimentation, reflection, and continually refining your approach.
Experimenting with Different Techniques
Don’t be afraid to try new things. Experiment with different transitions, explore various colour grading styles, or play with different pacing. Watch films and videos by other creators you admire and try to deconstruct their editing choices. How do they use cuts to build suspense? What role does music play in their narrative? Emulation can be a powerful learning tool, but ultimately, you’ll want to find your own creative signature.
Refining Your Workflow for Efficiency
As you gain experience, you’ll naturally develop a workflow that suits your individual preferences and the type of projects you undertake. This might involve creating keyboard shortcuts for frequently used actions, building personalised project templates, or establishing a routine for importing and organising footage. Continually evaluate your process and look for ways to optimise it. Time saved on repetitive tasks can be reinvested into creative exploration and refinement, leading to more polished and impactful videos. The journey from amateur to professional is a continuous process of learning, practising, and refining, and by embracing these fundamentals, you’ll be well on your way to crafting compelling visual stories.

Our mission is to assist students, beginners, and professionals in learning more effectively, developing practical skills, and enhancing their confidence in today’s digital world.